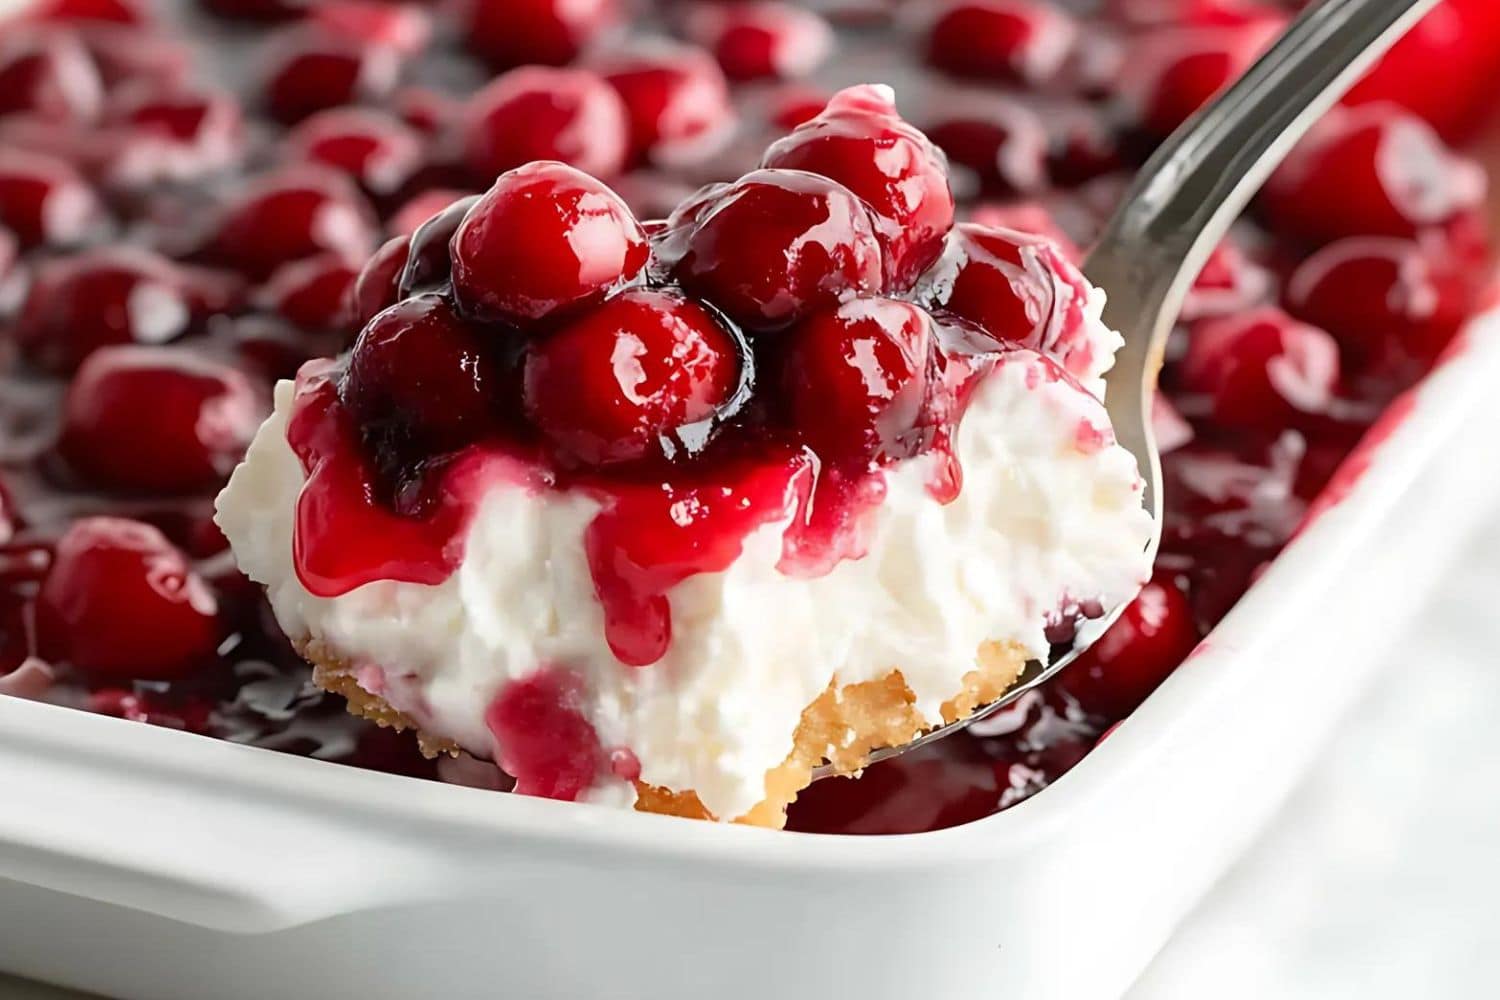

Cherries in the snow is a combo of fluffy angel food cake, smooth cream cheese, and sweetly tart cherries. Every time I make it, somebody asks me for the recipe!
This classic no-bake dessert is as pretty as it is delicious. Despite its fancy appearance, this vintage recipe comes together in just 20 minutes.
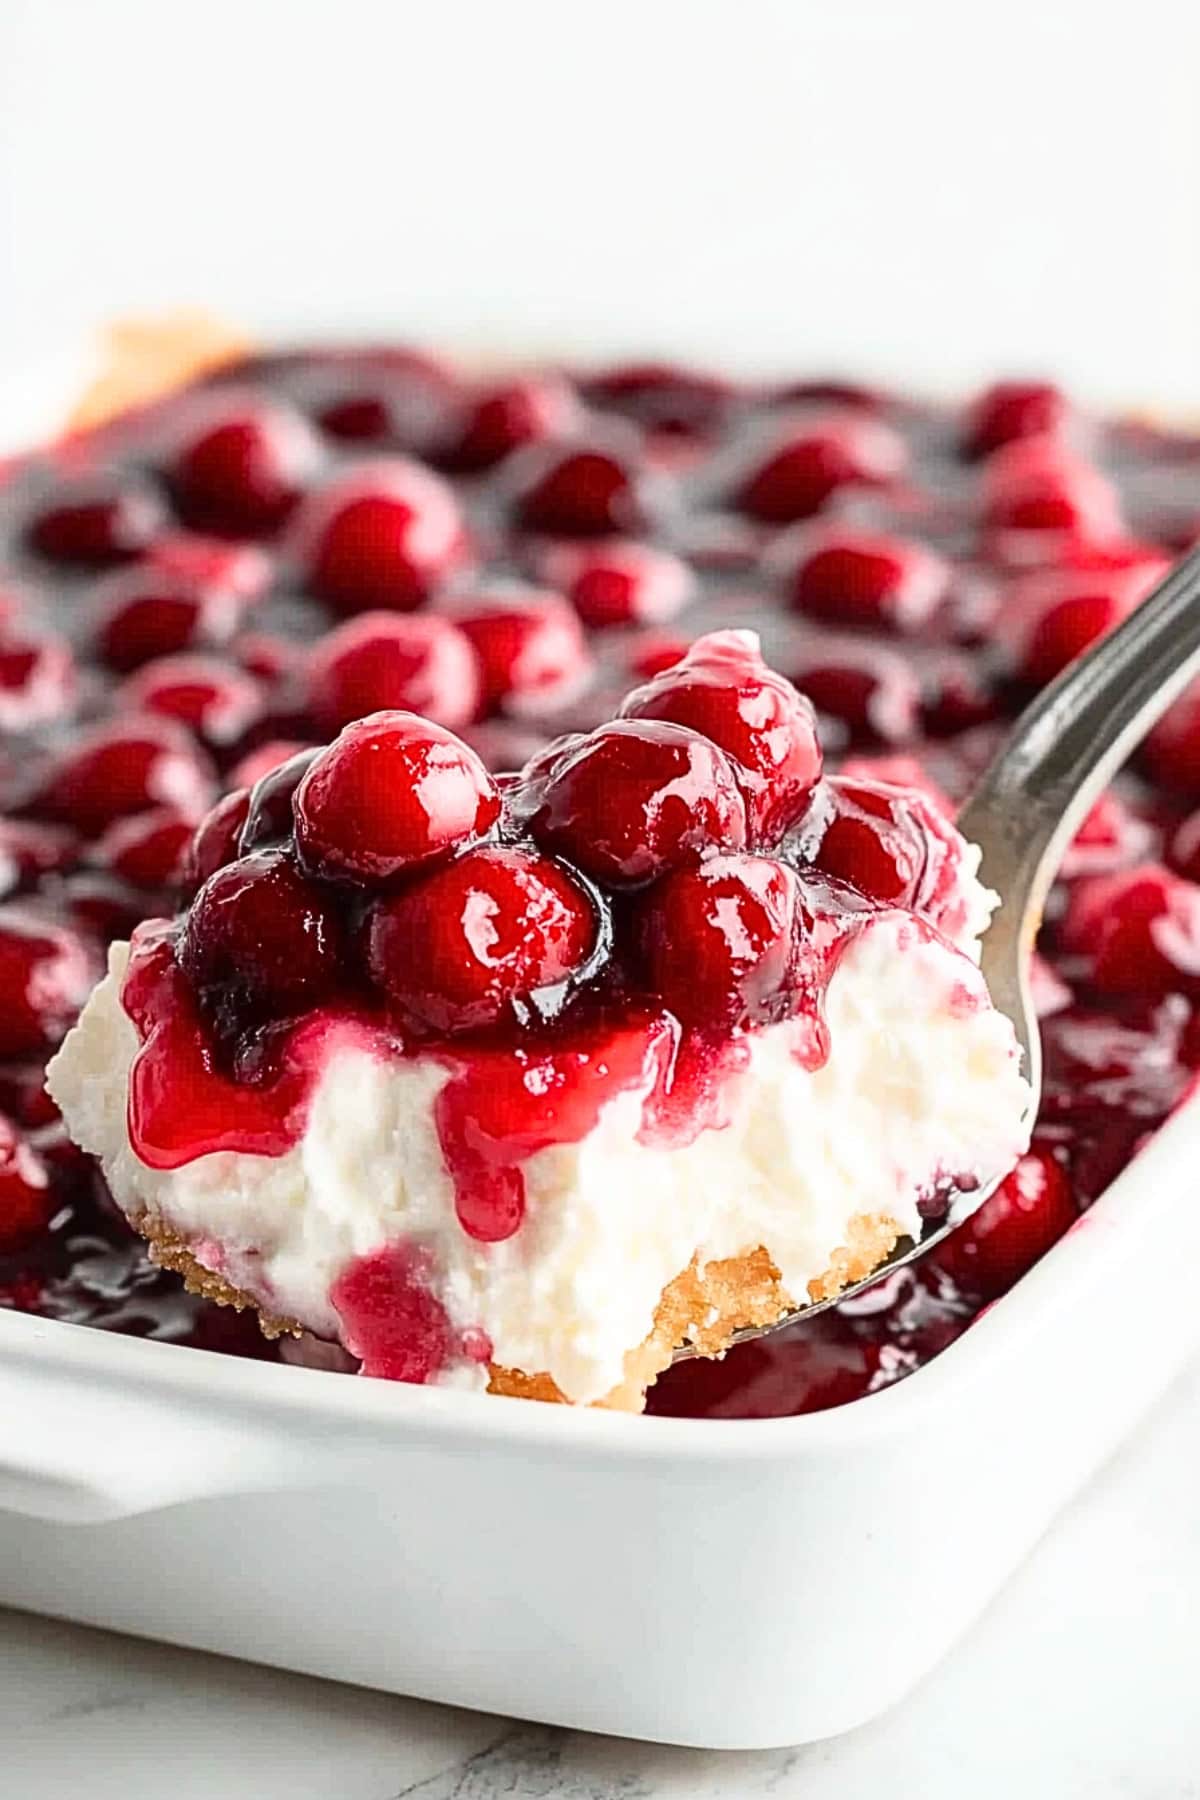
It’s light, creamy, and so full of flavor, you won’t be able to resist going back for a second bowl!
Make it today and see what all the fuss is about.
Why You’ll Love Cherries in the Snow
Effortless Elegance: The contrast of bright red cherries against snowy white cream is stunning. It’s a simple dessert that elevates any occasion.
Make-Ahead Dessert: You can prepare this dessert up to 24 hours before you plan to serve it. It even tastes better if you do! That makes it perfect for entertaining or potlucks.
Crowd-Pleaser: The mix of fluffy cake, creamy filling, and sweet-tart cherries appeals to a wide range of palates. Everyone at your gathering will love it!
Ingredients
- Angel Food Cake: You can use homemade or store-bought cake. I prefer homemade for taste and store-bought when I’m in a hurry. Either way, it’s the fluffy, cloud-like base.
- Cream Cheese: Use full-fat cream cheese for the best flavor. It’ll add a luscious creaminess to every bite.
- Powdered Sugar: Because it’s so fine, powdered sugar dissolves nicely into the cream. It provides sweetness without compromising the cream’s texture.
- Milk: Add a splash to thin and smooth the cream cheese.
- Vanilla Extract: Just a little will infuse the filling with a rich, warm sweetness.
- Cool Whip: It gives this dessert its phenomenal, melt-in-your-mouth texture. Stick to the store-bought stuff for the most stability.
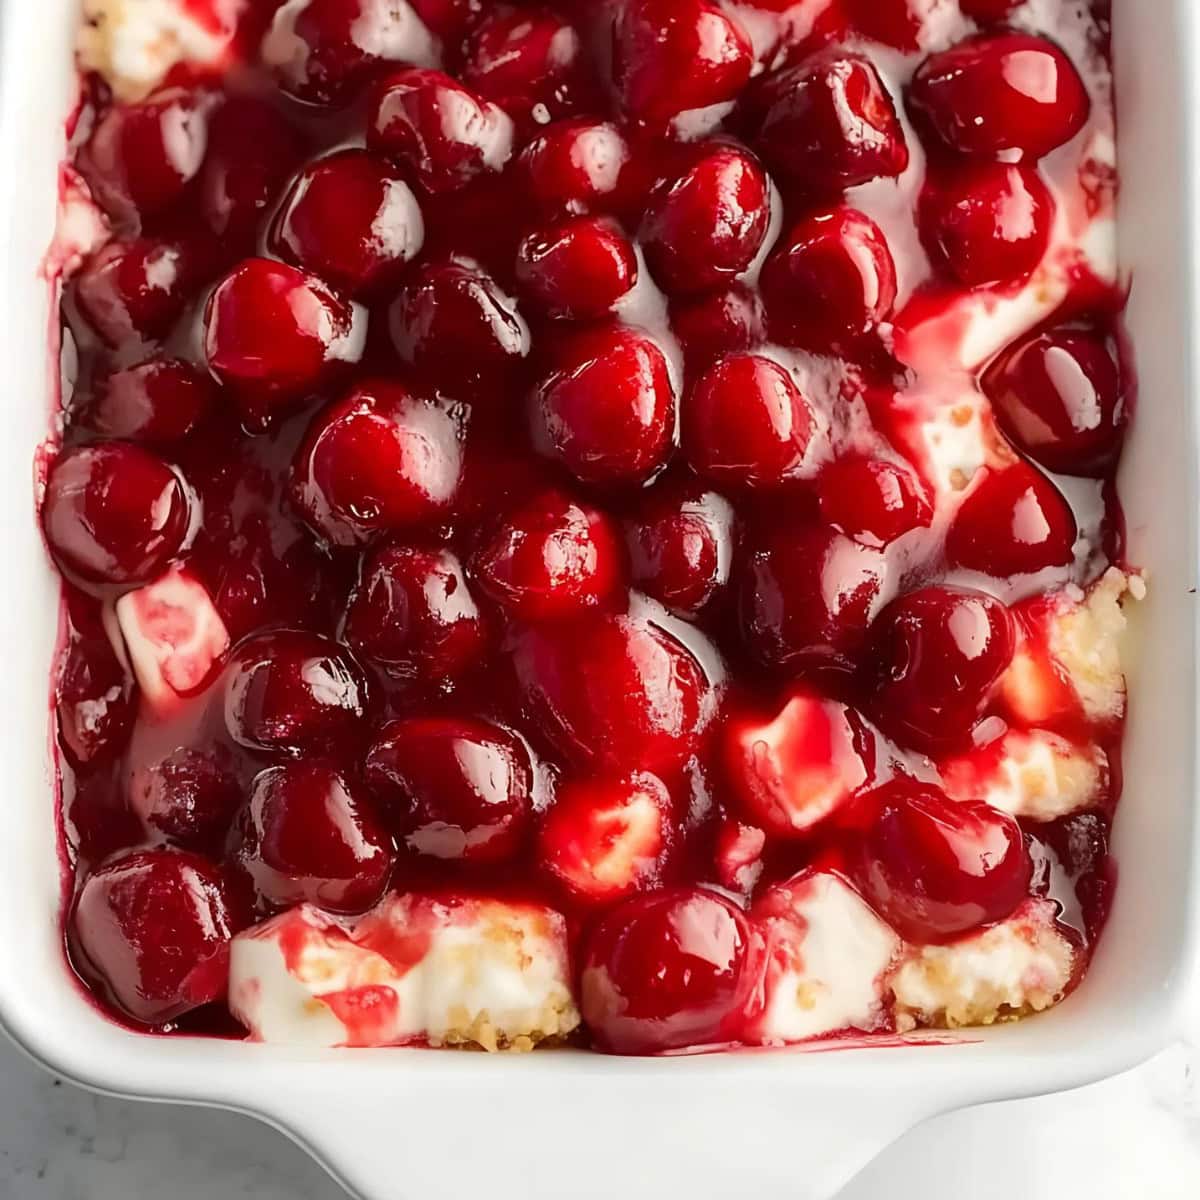
- Cherry Pie Filling: The brilliantly red star of the show. The juicy, ruby red cherries crown this dreamy dessert and make it look as good as it tastes.
How to Make Cherries in the Snow
Because cherries in the snow is a no-bake dessert, it’s extremely easy to pull together. Especially if you start with a store-bought angel food cake.
Simply follow these steps to whip it up.
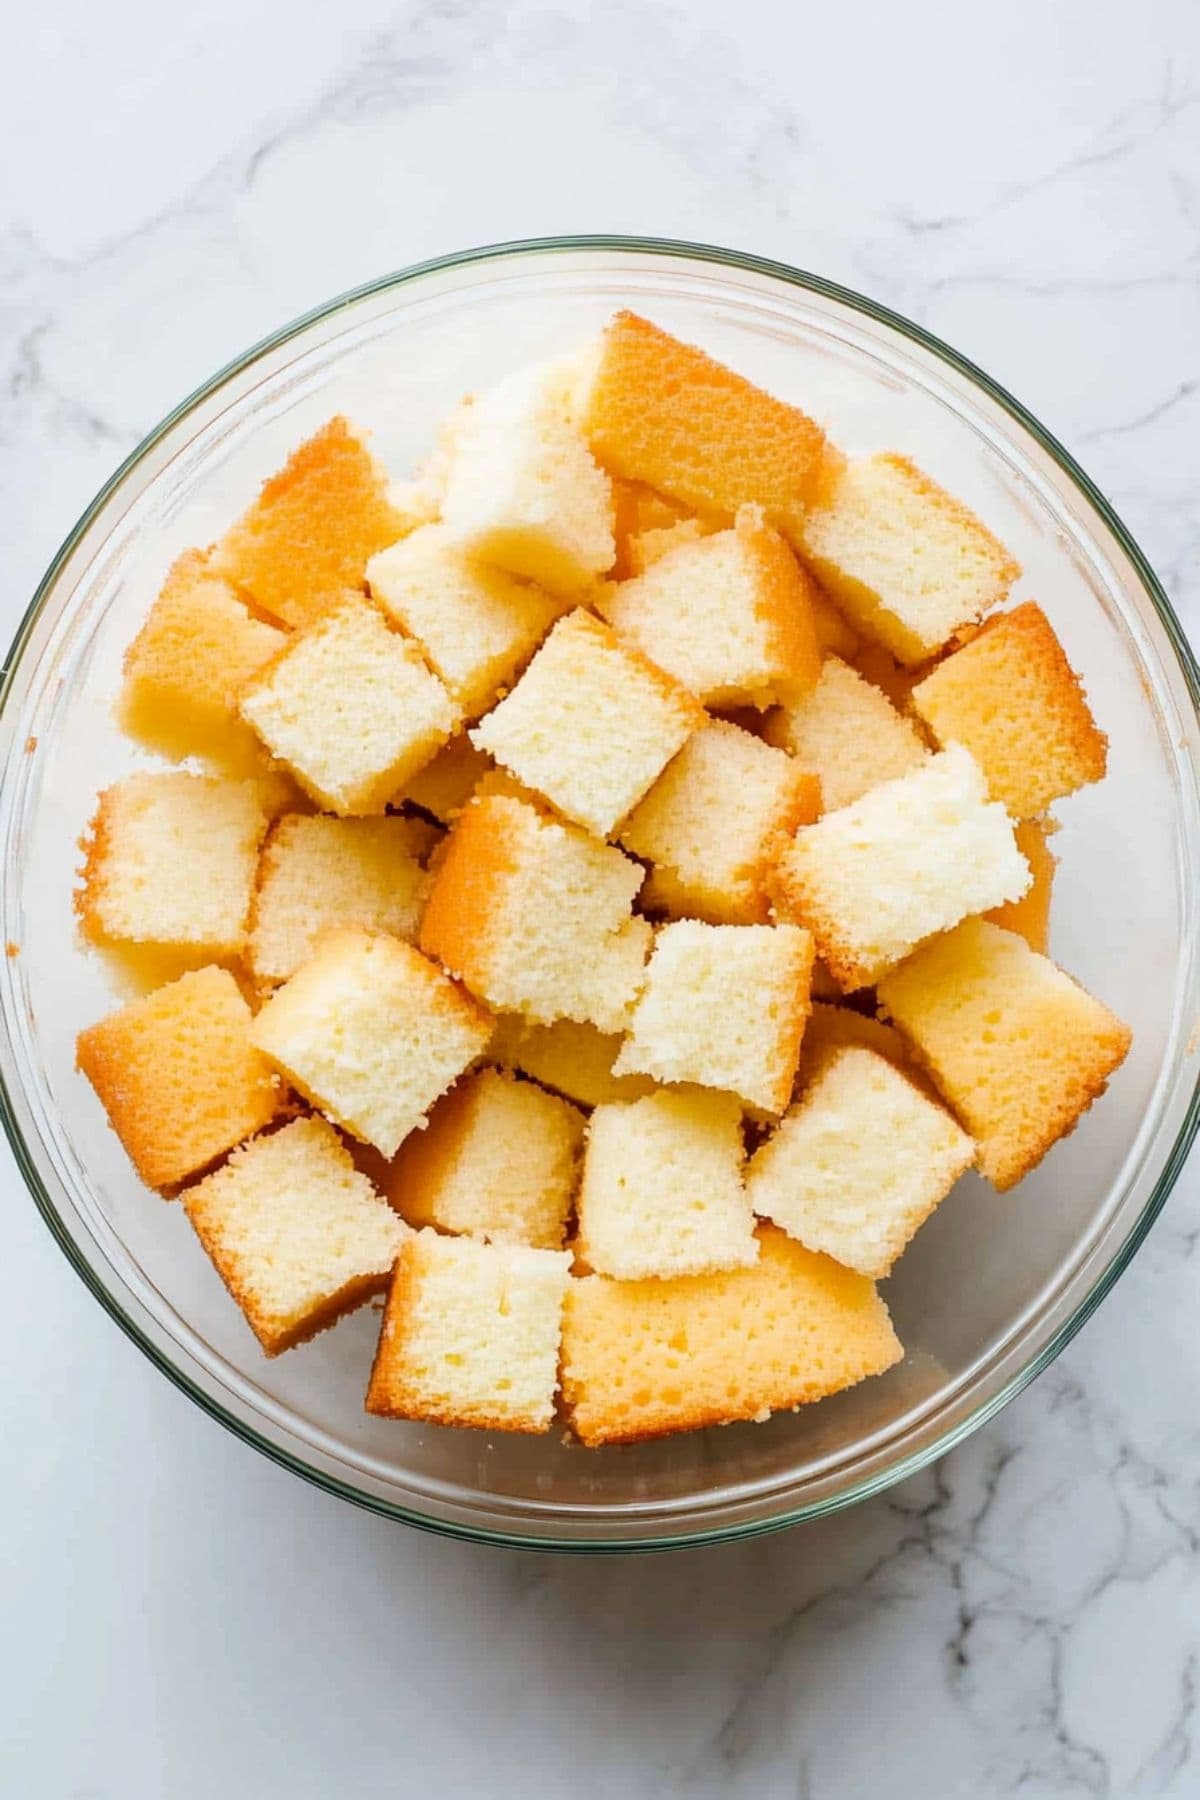
1. Cube the cake. Cut the cake into 1-inch cubes. Set aside.
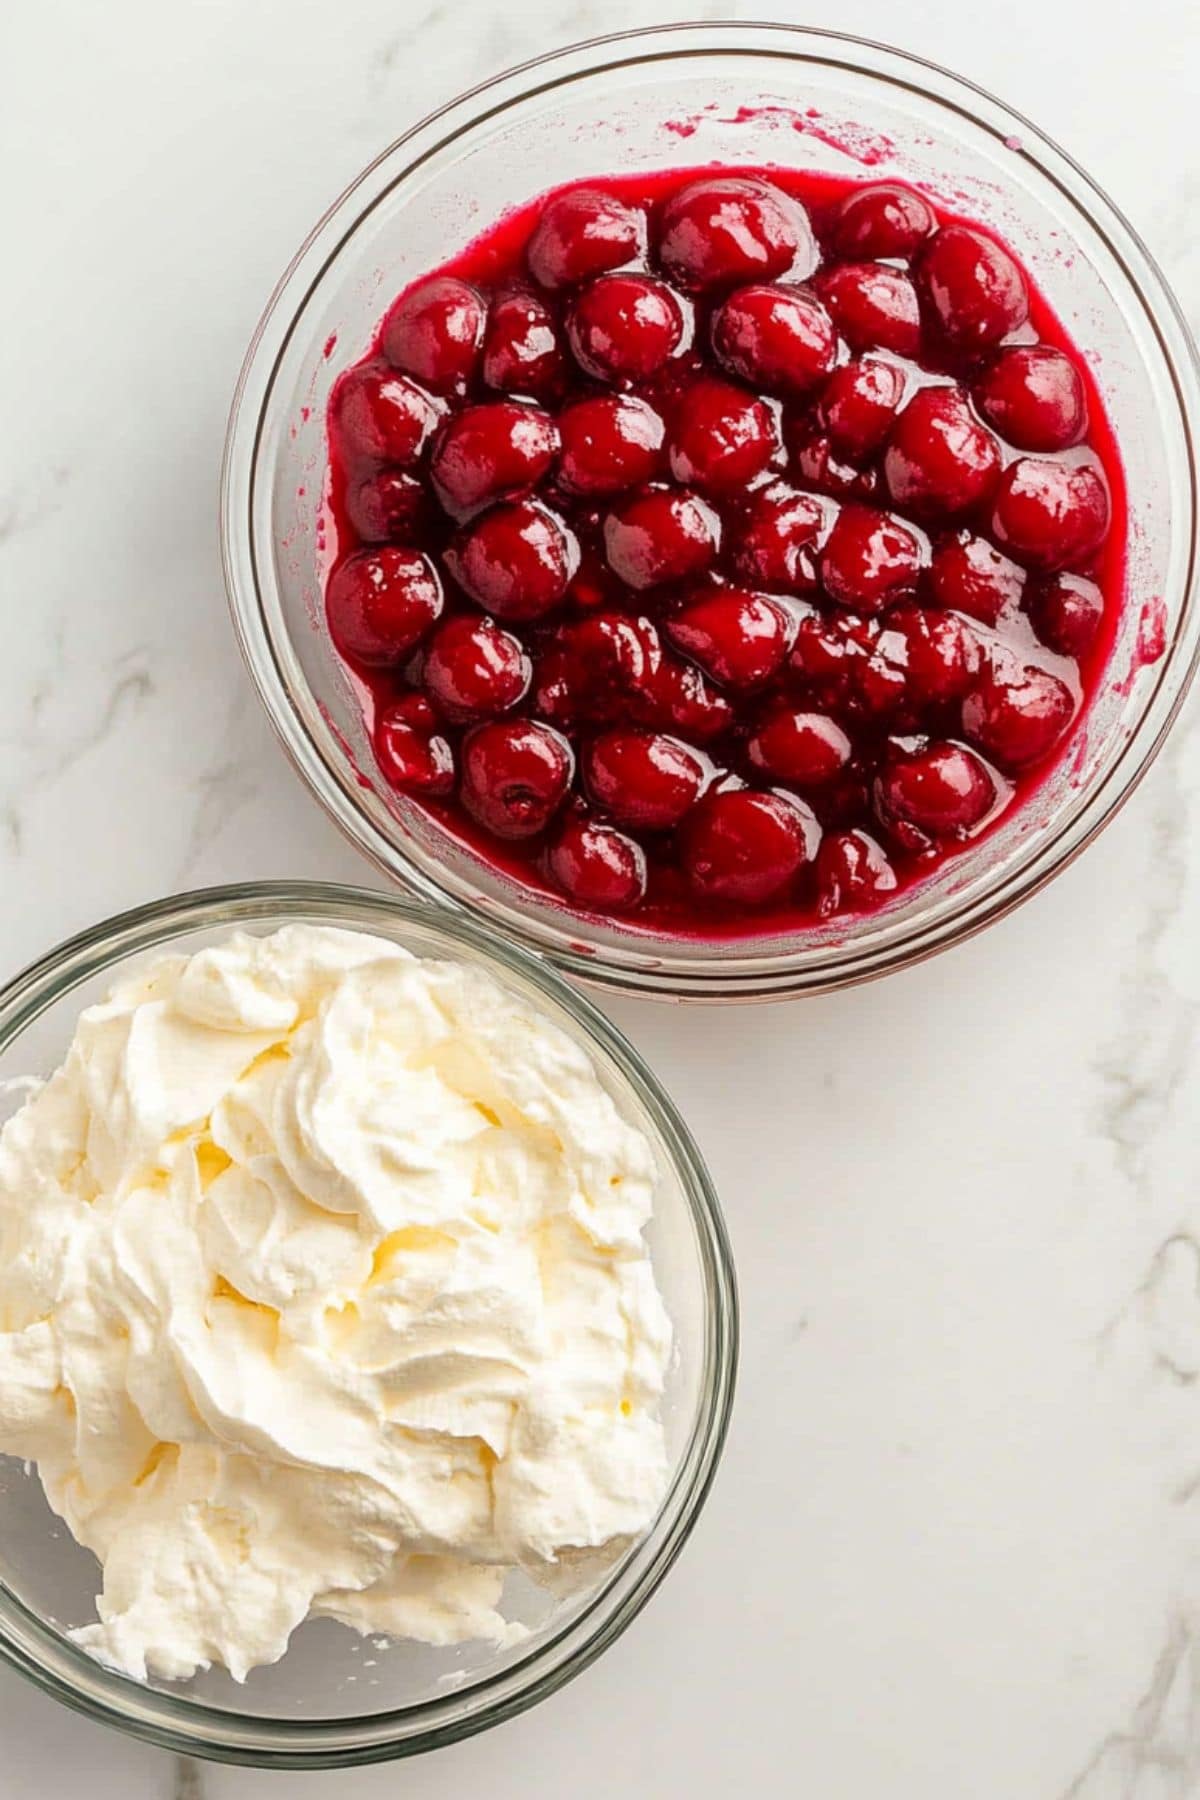
2. Make the filling. Beat the softened cream cheese in a large bowl until smooth. Then, slowly mix in the powdered sugar, milk, and vanilla extract. Finally, gently mix in the thawed Cool Whip. Stop mixing as soon as the Cool Whip is incorporated.
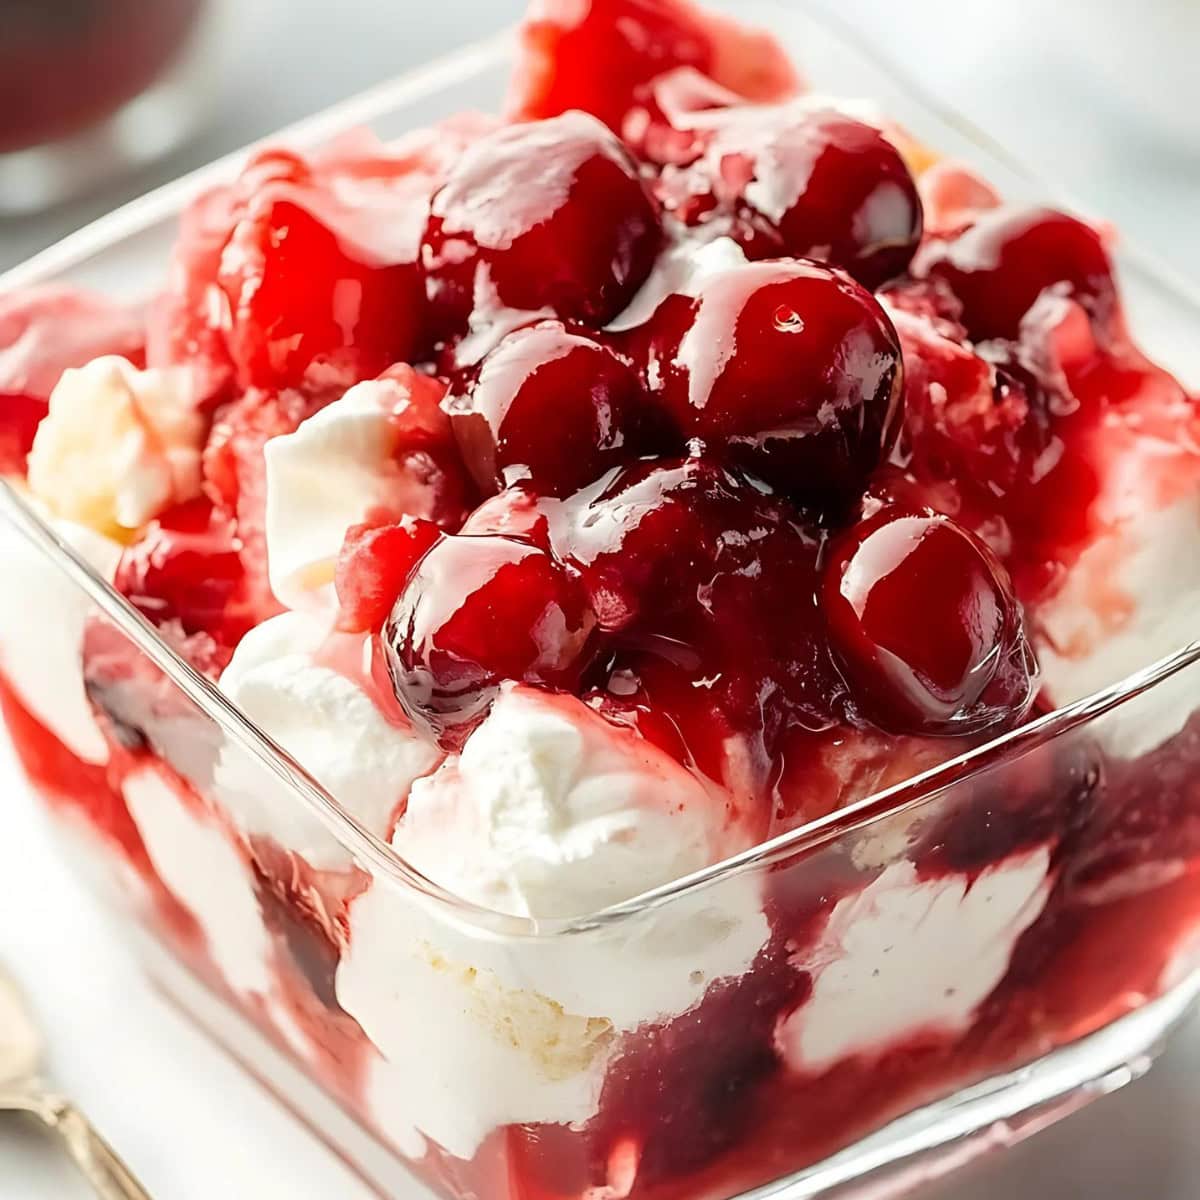
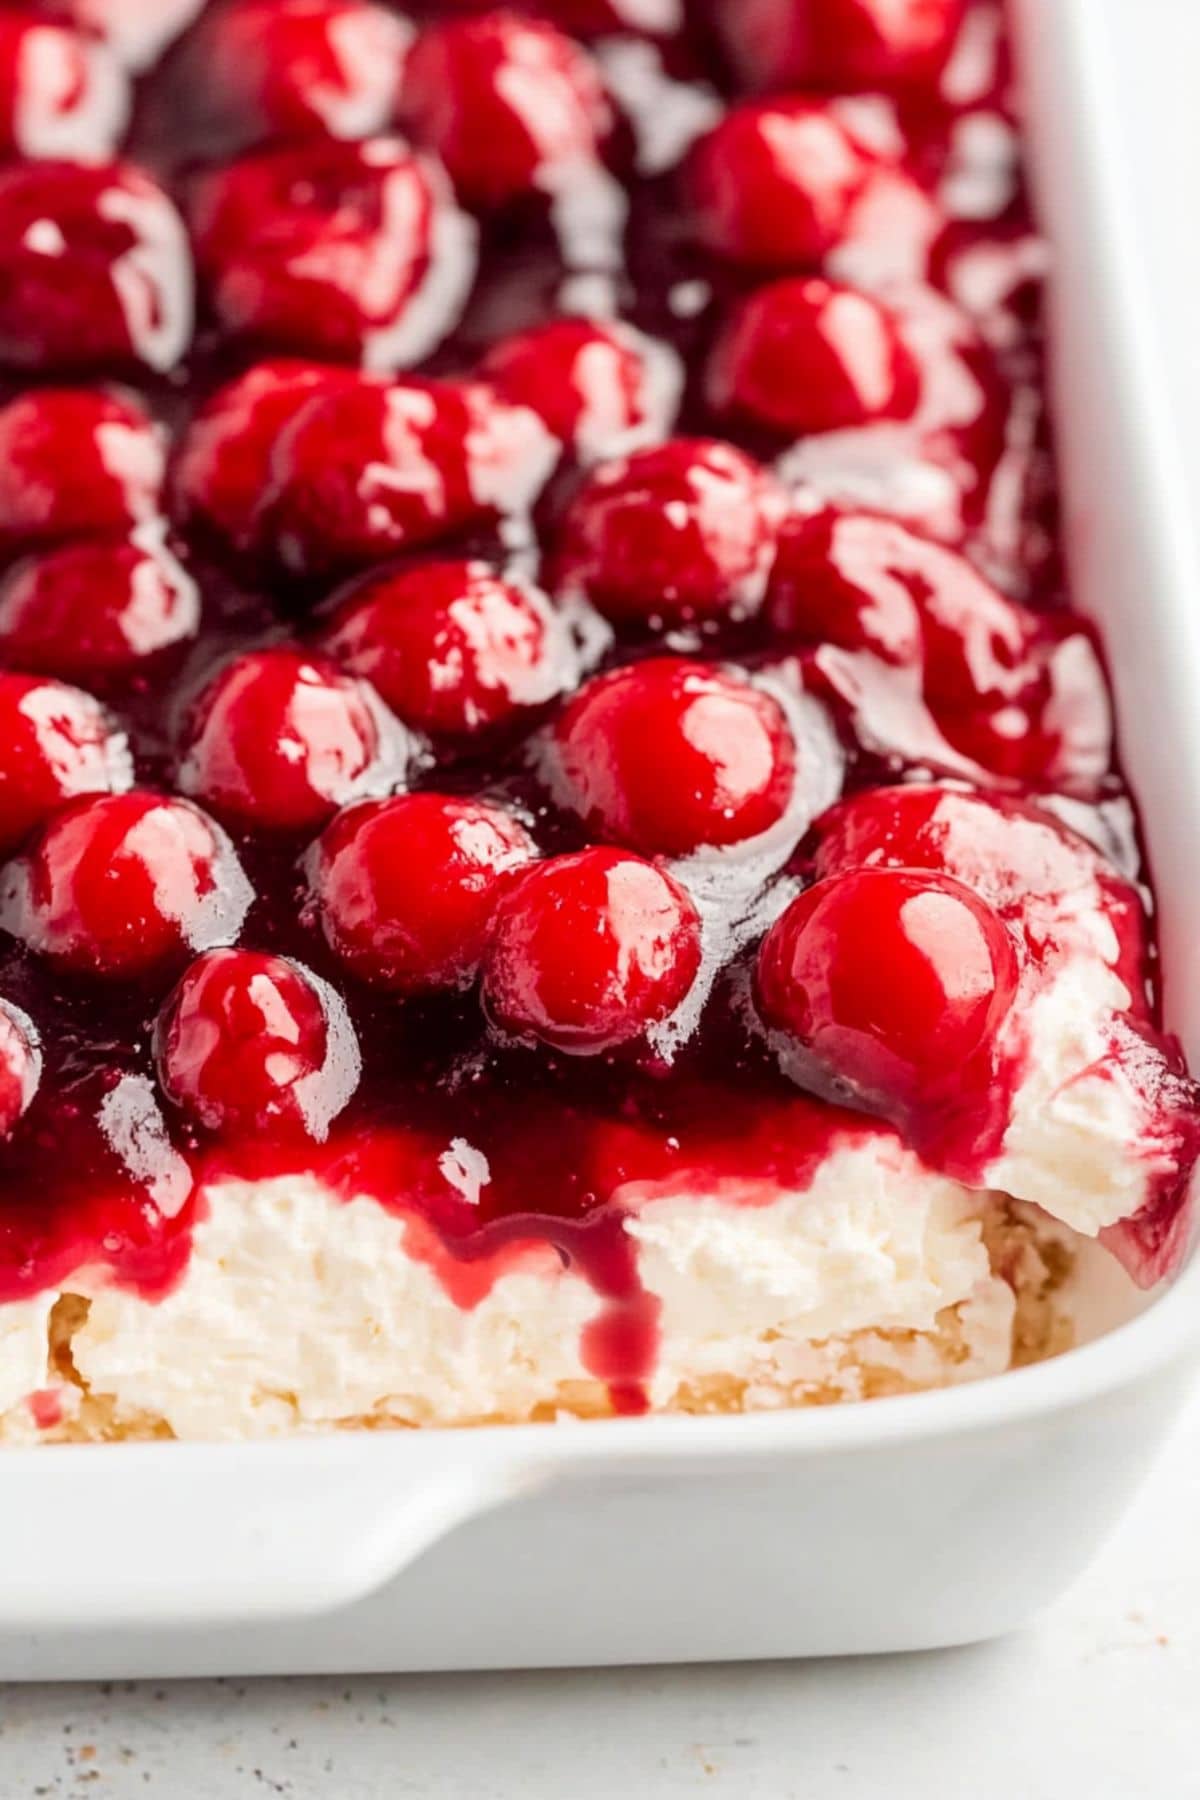
3. Assemble. Use a trifle dish or 9×13-inch cake pan. Place a layer of cake cubes over the bottom and spread half the cream cheese mixture on top. Then, spoon half of the cherry pie filling over that. Repeat until you’ve used all the cake, cream cheese, and pie filling.
4. Chill and serve. Cover the dish or cake pan and refrigerate it for at least 4 hours. To serve, scoop out portions so each serving contains all the layers.
Tips for the Best Cherries in the Snow
Despite how simple this recipe is, I still have a few tips to make it even easier.
- Keep the cream cheese soft. Anyone who’s worked with cream cheese can tell you it’s much more manageable when soft. Set it out for 30 minutes to an hour beforehand.
- Cube the cake evenly. Ensure you cut the cake into as evenly sized squares as possible. That’ll make the layering process simpler and the dessert look nicer.
- Add pretty garnishes. This is a lovely dessert as is. You can jazz it up even more with a few chocolate shavings, sugared cherries, or a dollop of extra whipped cream.
- Be creative and have fun! You don’t have to stick strictly to the recipe. Try making the dessert with different pie fillings, such as blueberry or peach. You can also add flavored instant pudding mixes to the cream cheese.
How to Store
Remember, you can make cherries in the snow up to 24 hours ahead of time. Simply let it chill in the fridge until you’re ready to serve it.
Leftovers store easily, too!
To Store: Cover the dessert tightly with plastic wrap. Refrigerate it for up to 3 days. Any longer and the cake pieces may become soggy.
To Freeze: You can store leftover cherries in the snow whole or in individual servings. Simply wrap the leftovers tightly in plastic wrap. Then, transfer them to a freezer-safe bag or airtight container. Freeze for up to 1 month.
To Thaw: Let frozen cherries in the snow thaw in the fridge overnight. Then, serve chilled straight from the refrigerator.
Cherries in the Snow
12
servings20
minutes330
This recipe for cherries in the snow is heavenly! The combo of angel food cake, cream cheese, and cherries never fails to deliver.
Ingredients
1 pre-baked 9-inch angel food cake
8 ounces cream cheese, softened
1/2 cup powdered sugar
1/2 cup milk
1 teaspoon vanilla extract
12 ounces Cool Whip, thawed
1 (21-ounce) can cherry pie filling
Instructions
- Cut the angel food cake into 1-inch cubes and set aside.
- In a large bowl, beat the softened cream cheese until smooth. Gradually mix in the powdered sugar, milk, and vanilla extract until well combined.
- Gently stir the thawed Cool Whip into the cream cheese mixture until just incorporated.
- In a trifle dish or 9×13 inch pan, place a layer of angel food cake cubes to cover the bottom.
- Spread half of the cream cheese mixture evenly over the cake cubes. Then spoon half of the cherry pie filling over the cream layer.
- Repeat layers with the remaining cake cubes, cream mixture, and cherry pie filling.
- Cover and refrigerate for at least 4 hours or overnight before serving. This allows the flavors to meld together.
- To serve, scoop out portions so each serving contains all the delicious layers. Enjoy this cool, creamy retro dessert!
Notes
- For extra indulgence, garnish with chocolate shavings, sugared cherries, or a dollop of whipped cream.